COMMON DOUBTS
Placement of LIGHT and HEAT sources
- UVB + HEAT source
If we have opted for a light source that does not emit heat, such as compact factor 5.0 or 10.0 bulbs, we will place the light bulb in the center of the terrarium. The heat bulb should be placed more towards the end with the high vent, this helps to ventilate the terrarium efficiently.
- HID + HEAT source
In this case, since the light source also emits heat, we will play with its position and inclination to more easily achieve a thermal gradient and thus favor the ventilation of the terrarium.

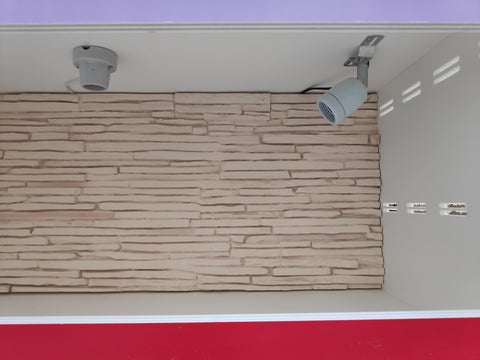
If you have purchased a kit, you will have a fixed lamp holder and an adjustable one. We will place the heat bulb in the fixed one and the HID in the adjustable one, the latter goes in the end that has the high ventilation and we will place it inclined towards the center of the terrarium.
The HID bulb must be connected to the adjustable lamp holder and this in turn to the electronic ballast. If we are going to use a controller, we will connect the ballast to the LIGHT part.

ULTRA COMPLETE thermostat
FULL automation
Follow the step-by-step programming video to automate your terrarium.
You must be clear before starting:
- Temperature you want for the day.
- Temperature you want at night.
- From what time to what time should the day cycle be.
As indicated in the terrarium assembly manual, the screen cable must be passed between the base and the back during assembly. The probe must remain inside the terrarium.

HID equipment
HID bulbs are somewhat peculiar.
It is necessary to take into account the VERY IMPORTANT label that appears on the bulb box.
It indicates that the following should be done:
- Screw the bulb into the socket
- Make sure the bulb holder switch is ON, you can test with another bulb.
- Connects the lamp holder to the ballast
- Finally, connect the ballast to the house current and not to the controller. This is how we verify that the bulb works correctly before making it work with the controller.
If power is first applied to the ballast and then the bulb switch is turned on, the bulb is plugged in, or the socket is plugged in then the bulb will not light.
When the ballast begins to receive power, the bulb must be completely connected with all the switches in ON. Otherwise it won't work.
It is normal for the ballast to make a small noise/hum.